


Kawaii Amigurumi CupCake Keychain


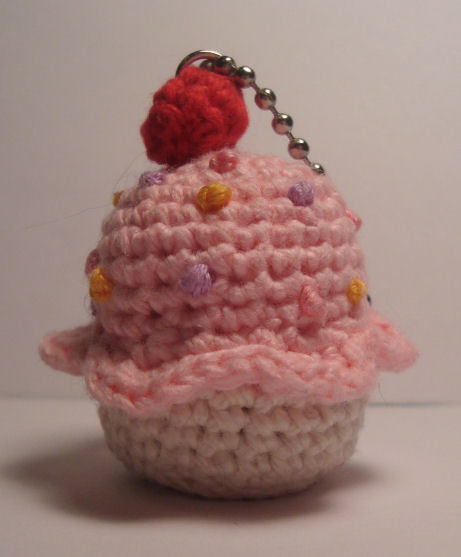
Front View
It was made with half strands of yarn and a 2mm crochet hook. The bottom is worked to be actually flat. I didn’t take good notes as I made it and just winged it, but I put up the pattern as best I recall and have sussed out from looking at the thing. If this is done with a bigger hook and full strands of yarn, it’ll just be bigger, like little pin cushion sized.
-

- Back View
-
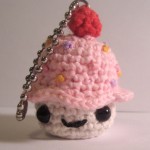
- Front View
-

- It’s on a bathtub Chain!

-

- Flat Bottom!

2mm hook for half strands of yarn or smaller for crochet cotton.
3.5mm hook for worsted weight yarn.
SC = Single Crochet
INVDEC = Invisible Decrease
INC = Increase (2 SC in one stitch)
CupCake Top
CH2 or Magic Ring or however you like to start
1. SC x 6 (6)
2. INC in each ST (12)
3. SC then INC; repeat around (18)
4. SC x 2 then INC; repeat around (24)
5. SC around (repeat for rounds 6 through 9) (24)
10. SC x 2 then INC x 2; repeat around (36)
11. SL ST x 4 then SC x 3 in each of the next two ST (sort of like and increase but put 3 SC in the ST instead of 2); repeat around (72)
Finish off and weave in the tail
Decorate with French Knots or whatever you like.
CupCake Bottom
CH2 or Magic Ring or however you like to start
1. SC x 6 (6)
2. INC in each ST (12)
3. INC x 6 then SC x 6 (18)
4. SL ST around (to form the flat bottom of the cupcake) (18)
Round 5 is done in the backloop only of round 3, leaving the SL ST line totally untouched, you may need to CH 1 to get to it.
5. SC around (18)
6. repeat round 5 for rounds 6 through 13 (18)
Finish off and keep a long tail for attaching to the cupcake top
Cherry
CH2 or Magic Ring or however you like to start
1. SC x 6 (6)
2. INC in each ST (12)
3. INV DEC x 6 (6)
Finish off and keep a long tail to sew into cupcake frosting.


This is really cute !!! Thank you so much for an cute and amazing pattern ^-^
IIIIII absolutely love youuuuu!! Thank you for all your amazing patterns, they are just gorgeous!! I can’t make a donation at the moment, but I’ll try to make sure I make one as soon as I can. ^_^ In any case, if you ever want to translate your patterns to Spanish I can do that for you ^_^ Thanks again!!
Hello 🙂
when you said to repeat round 5 in rounds 6 through 13 , do you mean to sc in the backloop of the st ?
No just regular SC all the way around, on it each st, both loops.
[…] Kawaii Cupcake Keychain by Nerdigurumi Yarn: Lion Brand Vanna’s Choice black. And some unknown acrylic pink […]
I got it nvm! lol
And one more thing, are we suppose to go back to the third round and restitch into it again? If we are how do we do this? Or how do we know that we are stitching in the the right place? (the the Vs have been a guide for me so thats why its a little daunting to me @_@ ) Sorry for so many questions!
For the bottom of the cupcake, when we begin round 5 in the outer most loop, am I right to assume that we are slip stitching into this loop or are we doing a a regular SC?
This was my first time using such a tiny hook and it was a wee bit difficult but the finished product is definitely worth it. Such a cute little guy!
Quick question: how did you split the yarn in half? I managed to do it… but it was insanely irratating. There’s got to be an easier way!
Probably a similar way, insanely irritating :D. You can also use crochet cotton or sock yarn which is usually that light weight.
The bottom of the cupcake is really messed up. Looks like an ice cream!
What?
Do you put anything inside of it for it to keep it’s shape. I made a big one and I don’e know what I could use.
I stuffed it with polyester fiber fill, it’s fluffy polyester fibers. You can usually find this in craft stores or fabric stores. It’s basically the same as what is inside pillows.
how do you assemble it?
Stitch the bottom cup to the underside of the icing cap then stuff and close.
Hi there,
I hope that you get this really, really quick ‘cuz I really need help!
I was wondering how to do this part of the pattern:
SL ST x 4 then SC x 3 in each of the next two ST
Please help me!
Oh! I also have a request. Can you make a youtube video of this pattern?
Thank you so much!
xoxoxo,
Anaira<3
That means in the first stitch from the previous row, so 1 slip stitch, then in the second stitch from the previous row, 1 slip stitch, third stitch from the previous row, one slip stitch then in the fourth, one slip stitch, then in the next stitch from the previous row, work three single crochets into the stitch (think like an increase only with 3) and then in the next stitch from the previous row, work 3 single crochet stitches, then repeat that sequence. I will not likely be making a youtube video of this pattern, sorry. Hope that helps!
Hi! This really helps but I already made the cupcake. But I invented that part :p
Hehehe! When I went to school today, my friends thought it was an ice-cream. Yes, it helps. It would be nice if you made more videos in your youtube channel. Have a super duper ristic nice day!
You have some of the cutest patterns I have ever seen! I think I will be making a few of these cupcakes for family and friends! Just too cute!!
i dont quite understand what do u mean by : repeat for rounds 6 through 9 neither for rounds 6 through 13 ….could u explain it to me ? thank u very much 😀
It was one of my earlier patterns and not very well written but basically after round 5 of the cupcake bottom do 8 rounds of single crochet around (18 stitches in each round). You are repeating round five (SC around) for each of the rounds 6 through 13.
My bottom is massive. I used 2 ply yarn and a b hook, but its still huge. Is it supposed to be so big? Can I have a comparison pic or something similar to that please?
The bottom should be around the size of a quarter. I don’t have the keychain anymore because it was given away as a gift so I can’t give you a comparison photo, sorry.
Do you think an f hook would alter the size much?
It will make it larger, but if you are using a full strand of yarn and not a half strand (as I was using) or crochet thread, that would likely be the appropriate hook to use anyhow. The great thing is, since it’s not wearable, size isn’t a huge deal 🙂 It’ll end up quite a bit bigger than mine, but still be completely workable as a keychain.
very cute :3 i made a TON for my friends and i. we all have diffrent colors and they are AMAZINGLY easy to make.
Thanx a Lot!!!
-Hugz from Hawai’i
For cupcake bottom round 6-13 do we SC in the back loop only as well? or in both loops as usual?
Both loops as usual 🙂
hey what do you mean by Round 5 is done in the backloop only of round 3, leaving the SL ST line totally untouched, you may need to CH 1 to get to it.
What is meant is, after round 3, do slip stitches all the way around, this will give the bottom of the cupcake a sort of “spine” or edge, so it sits flat and has an edge, next, rather than crocheting round 5 in the line of slip stitches you just did, you will ch1 and crochet through the outermost loop of the single crochets from round 3. If that is still unclear let me know and I can take a photo or something to help 🙂
Would you plz take a video or a pic of the sl st x 4 then sc x3 in each 2 st plz? I’m really confused about that.
Sorry I don’t have time to make a video or my set up but it’s not very complicated.
Basically you have 36 stitches from the previous row, and the instructions say:
SL ST x 4 then SC x 3 in each of the next two ST (sort of like and increase but put 3 SC in the ST instead of 2); repeat around (72)
You are going to repeat a sequence that covers 6 stitches from the previous row, 6 times. The sequence is as follows:
in your first 4 stitches do a Slip stitch, in the next stitch from the previous row, do 3 single crochets (think of it like an increase only instead of 2 single crochets in one hole you are doing 3), then in the next stitch from the previous row do 3 single crochets. That is the sequence, repeat it 5 more times and then you’re done!
[…] Häufchen , lustige kugelrunde Kätzchen, ein sehr hungriges Nilpferd und ein supersüßes Törtchen. Für die, die auf neue Smiley-Links hoffen, habe ich natürlich auch wieder etwas und zwar […]